

 Topiry

Best Free Video Editing Software for Beginners in 2026
Video editing used to be a skill reserved for professionals with expensive suites and even more expensive computers. That’s no longer true. In 2026, some of the most capable editing tools available cost absolutely nothing, and a handful of them rival paid software in terms of features, stability, and export quality. Whether you’re editing vlogs, short-form content for social media, or your first documentary project, there’s a free tool out there that can carry you from your very first cut to a polished final export.
In this guide, we break down the best free video editing programs for beginners, explain what makes each one worth your time, and help you figure out which one actually fits your workflow instead of just chasing whatever is trending this week.
Why Free Software Can Still Be Powerful
There’s a common myth that “free” automatically means “limited.” That might have been fair a decade ago, but the free editing landscape today looks completely different. Companies now use free tiers as an entry point into larger ecosystems, which means many free tools are built on the same engines as their paid counterparts.
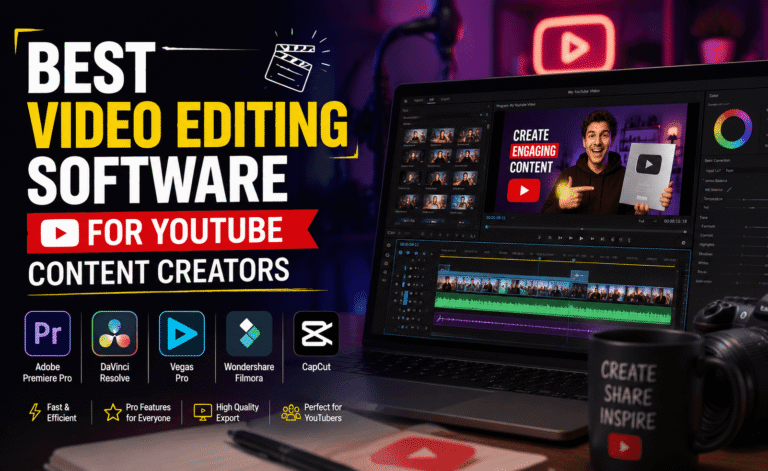
Take DaVinci Resolve, for example. Its free version includes color grading tools, multi-track audio editing, and visual effects capabilities that were once exclusive to Hollywood post-production houses. Or consider CapCut, which packs AI-assisted editing features that would have sounded like science fiction just a few years ago. The gap between free and paid software has narrowed dramatically, and for beginners, that’s fantastic news.
What you typically give up with free software isn’t quality — it’s convenience. Watermarks on some export presets, fewer cloud storage perks, slightly slower rendering, or a ceiling on 4K/8K workflows are the usual trade-offs. For someone just starting out, none of these limitations will get in the way of learning or producing genuinely good content.
Top Free Video Editors Worth Trying
1. DaVinci Resolve (Free Version)
DaVinci Resolve is often the first recommendation from editing professionals, and for good reason. The free edition includes a full non-linear editor, a node-based color grading suite, Fairlight audio tools, and Fusion for visual effects and motion graphics. It’s genuinely used on real film and TV productions, which means the skills you build here transfer directly into professional environments.
The trade-off is a steeper learning curve. Resolve’s interface is organized into distinct “pages” (Cut, Edit, Color, Fairlight, Deliver), which can feel overwhelming at first. But once the layout clicks, it becomes one of the most efficient editing environments available at any price.
2. CapCut
Originally built for mobile, CapCut’s desktop version has become a favorite among creators making content for TikTok, Instagram Reels, and YouTube Shorts. It’s fast, intuitive, and loaded with AI-powered features like automatic captions, background removal, and one-click reframing for different aspect ratios.
CapCut isn’t designed for long-form filmmaking, but for short, punchy, social-first content, it’s hard to beat — especially for beginners who want to see results within their first hour of use.
3. Shotcut
Shotcut is a fully open-source editor that supports a huge range of formats natively, without needing to convert your footage first. It has a traditional timeline-based interface that will feel familiar if you’ve used any editing software before, and it’s actively maintained with frequent updates.
It lacks some of the AI conveniences of newer tools, but its stability and format flexibility make it a dependable workhorse for beginners who want a no-nonsense editor.
4. OpenShot
OpenShot prioritizes simplicity above everything else. Drag-and-drop editing, unlimited tracks, and a clean interface make it one of the most approachable options for someone who has genuinely never edited a video before. It won’t handle complex color grading or advanced effects work, but for trimming clips, adding transitions, and layering simple titles, it does the job cleanly.
5. Clipchamp
Built into Windows and backed by Microsoft, Clipchamp offers a browser-based and desktop editing experience with templates, stock media, and text-to-speech tools baked in. It’s aimed squarely at beginners and small business users who want quick, professional-looking results without a learning curve.
| Software | Best For | Learning Curve | Standout Feature |
|---|---|---|---|
| DaVinci Resolve | Long-form, professional-grade projects | Steep | Hollywood-grade color grading |
| CapCut | Short-form social content | Very Easy | AI captions & reframing |
| Shotcut | General-purpose editing | Moderate | Wide format support |
| OpenShot | Absolute beginners | Very Easy | Simple drag-and-drop UI |
| Clipchamp | Quick templated videos | Very Easy | Built-in templates & stock library |
How to Choose the Right Free Editor for You
Instead of picking based on popularity alone, think about the type of content you actually plan to make. Someone editing weekly YouTube vlogs has very different needs than someone producing 15-second TikTok clips or a short film for a festival submission.
- Long-form storytelling or filmmaking: DaVinci Resolve gives you room to grow into more advanced techniques without switching tools later.
- Short-form, fast-turnaround content: CapCut’s AI tools will save you hours compared to manually captioning and reframing clips.
- Learning fundamentals without distraction: OpenShot or Shotcut strip away the complexity so you can focus purely on cutting, pacing, and timing.
- Quick, templated business or personal videos: Clipchamp gets you from raw footage to a shareable video in the shortest amount of time.
The biggest mistake beginners make isn’t choosing the “wrong” software — it’s switching software every few weeks chasing a feature they don’t actually need yet.
Common Mistakes Beginners Make
New editors often fall into a handful of predictable traps. The first is over-editing: adding too many transitions, effects, and text animations because the software makes it easy, not because the story needs it. Restraint is a skill, and the best edits are often the ones the viewer doesn’t consciously notice.
The second mistake is ignoring audio. Viewers will forgive mediocre visuals far more readily than they’ll forgive bad audio. Even free tools include basic noise reduction and audio leveling — use them. A clean voice track with slightly imperfect video will always outperform stunning visuals paired with distorted or inconsistent sound.
The third mistake is skipping organization. Beginners often dump all their footage into one folder and one timeline, which turns editing into a nightmare within minutes. Get in the habit of labeling clips, creating folders by scene or topic, and using markers on your timeline early on — this habit alone will save you hours down the line.
Tips to Get Started Fast
Start with a short project — 60 to 90 seconds is plenty. Long projects overwhelm beginners and make it harder to finish, and finishing projects is how you actually improve. Watch a handful of tutorials specific to your chosen software rather than generic “editing tips” videos, since keyboard shortcuts and workflow differ significantly between programs.
Export early and often. Don’t wait until your project is “perfect” to see how it looks outside the editing software — colors, pacing, and audio levels can look different once exported and viewed on another device.
Essential Features to Look for Beyond Price
When you’re comparing free editors, it’s easy to fixate on the headline features — AI captions, one-click effects, flashy templates — while overlooking the less glamorous tools that actually determine how pleasant an editor is to use day-to-day. Keyboard shortcut customization, for instance, seems minor until you’re three hours into a project and constantly reaching for the mouse to perform actions you repeat dozens of times.
Pay attention to how each program handles proxy editing, especially if you’re working with 4K footage on a modest laptop. Some free tools automatically generate lower-resolution preview files so your timeline stays responsive, while others force you to edit at full resolution regardless of your hardware, which can turn a simple trim-and-arrange session into a frustrating, laggy experience.
Undo history depth is another underrated factor. Beginners experiment constantly, and a program that only lets you undo the last five or ten actions can be genuinely limiting compared to one that preserves dozens of steps back through your editing session. Similarly, autosave frequency matters more than most new editors realize — losing thirty minutes of careful trimming to a crash is a rite of passage nobody actually needs to go through.
Finally, consider file compatibility. Not every free editor handles every codec cleanly, and footage shot on a phone versus a mirrorless camera versus a screen recording tool can behave very differently once imported. If you regularly mix footage from multiple sources, prioritize software with broad native format support so you’re not constantly converting files before you can even start editing.
A Simple First-Project Workflow
If you’re staring at a blank timeline and not sure where to begin, following a repeatable structure removes a lot of the early friction. Start by importing all your footage and doing a rough “selects” pass — watch through everything once and mark the clips that are actually usable, discarding anything with obvious technical problems like severe camera shake or blown-out exposure.
Next, build a rough assembly. Drag your selected clips onto the timeline in roughly the order you want them to appear, without worrying about precise trimming yet. The goal at this stage is pacing and structure, not polish — you’re figuring out whether the story or sequence actually works before investing time in fine details.
Once the rough assembly feels right, move to detailed trimming: tightening cuts, removing dead air, and refining transitions between clips. Only after the visual edit feels solid should you turn your attention to audio — adding music, adjusting levels, and applying any noise reduction. Editing audio too early often means redoing that work after visual changes shift the timing anyway.
Save color correction and titles for last. These finishing touches are the most visually satisfying part of editing, which is exactly why it’s tempting to do them first — but doing so before your cut is locked usually means redoing work as the edit continues to evolve.
Final Thoughts
Free video editing software in 2026 is no longer a compromise — for most beginners, it’s genuinely the smartest place to start. You get real, professional-grade tools without financial risk, and by the time you outgrow the free tier (if you ever do), you’ll know exactly which paid features are actually worth paying for. Pick one tool from the list above, commit to a small first project, and focus on finishing rather than perfecting. That’s the fastest path from beginner to confident editor.
About the Author